Before we dive into the technical nitty-gritty, let’s have a brief discussion about what GS1 is, and perhaps more importantly, what it is not.
GS1 is a nonprofit organization that develops standards for business communication. In the context of barcodes, GS1 creates and maintains standards that can be used to encode various industry-standard identifiers into traditional barcode symbologies. Depending on the symbology, it can also allow for multiple values to be encoded into the same barcode.
This is useful in many industries because regardless of whether barcodes are scanned by humans or by machines, each independent scan adds time and increases the margin of error (errors can originate from the user, hardware, OR software layer). If multiple barcodes can be consolidated into a single barcode, the cost savings can be immense across an organization.
GS1 is not a barcode symbology. A barcode symbology is simply the visual appearance of a barcode. The symbology dictates how to translate a visual entity into a sequence of data bits, and vice versa. There are many symbologies available, most of which can be used to encapsulate GS1 data. Examples of popular linear barcode symbologies are Code 128 and Code 39. Examples of popular 2D barcode symbologies are Data Matrix and QR Code.
Barcode symbologies are typically implemented at the hardware layer, whereas GS1 is typically implemented at the application layer
There are exceptions to every rule, but an easy way to distinguish between a barcode symbology and GS1 is as follows: barcode symbologies are typically implemented at the hardware layer, whereas GS1 is typically implemented at the application layer.
So How Do I Make A GS1 Barcode?
This is a fair question, but not one that is easily answered. Since there are potentially infinite variations of GS1 barcodes, there isn’t a one-size-fits-all approach to creating a GS1 barcode. It all depends on which values need to be included in the barcode, and that can vary greatly from industry to industry or from label to label.
Since LabelZoom is widely used in distribution center settings, we’ll explore that use case in greater detail below.
How To Make a Blue Yonder GS1 Barcode
This tutorial was written for Blue Yonder WMS (Warehouse Management), so the procedure may vary for other Blue Yonder products, or other WMSes. If there is another product you’d like us to showcase, please let us know!
- Determine which values you’d like to include in the barcode. You’ll need to know the Application Identifier (AI) of each value, and understand which field in the application/database it corresponds to. For a full list of Application Identifiers, please visit the following link:
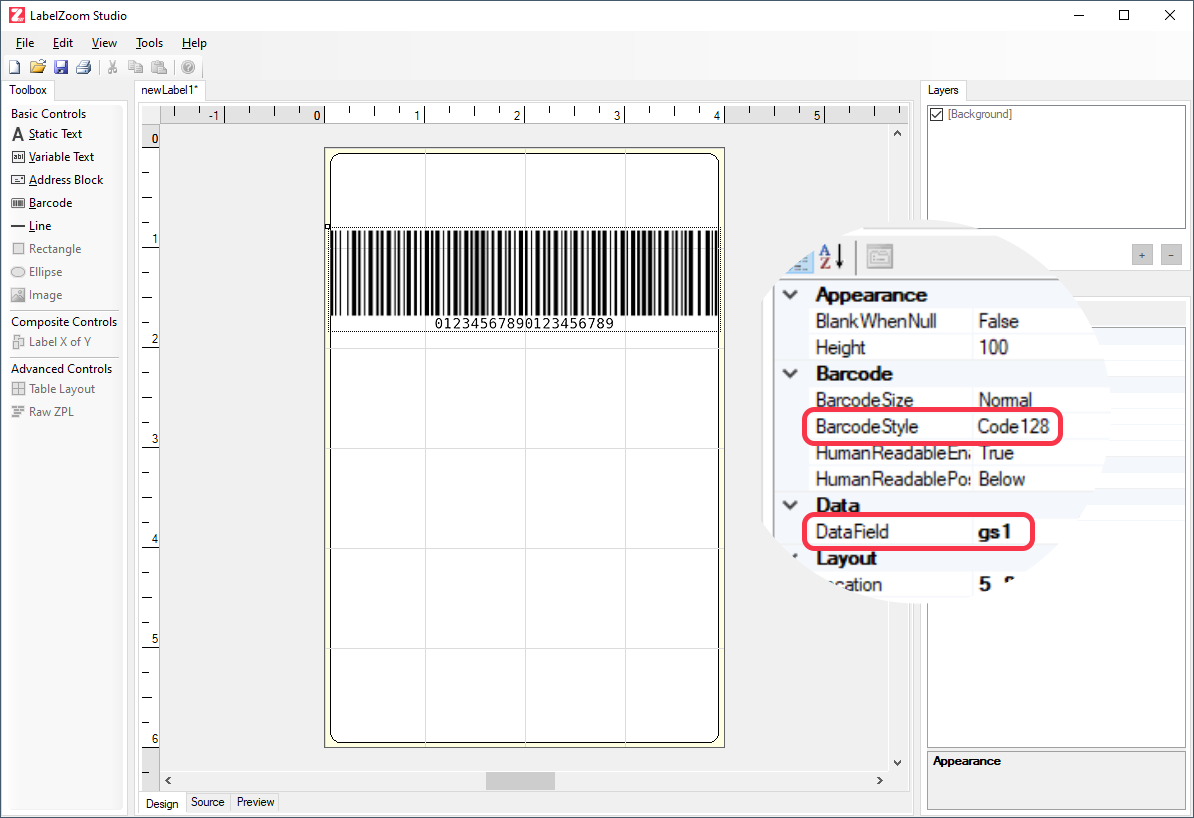
GS1 Application Identifiers – Barcodes | GS1 - Add a new barcode element to your label template. You can choose any symbology that your hardware supports in this step. A common choice is “Code 128”, which will allow you to create a GS1-128 barcode. We assign the barcode a variable name of “gs1”.

- Consult the printer manufacturer’s guide to understand how to encode the special control characters into the barcode data. For Zebra printers, we used the following guide:
Creating GS1 Barcodes with Zebra Printers for Data Matrix and Code 128 using ZPL - Write the SQL or MOCA code-behind to retrieve the proper values from the application database and concatenate them together into a single value. We chose GTIN, Serial Number, and Batch Number. We then assign the concatenated string the same variable name we chose in Step 2 (“gs1”). Our code looks like this:
[select '>;>801' || coalesce(alt_prtmst.alt_prtnum, invdtl.prtnum) || '21' || coalesce(inv_ser_num.ser_num, invlod.loducc, invlod.lodnum) || '>810>6' || invdtl.lotnum as gs1
   from invlod
   join invsub
     on invsub.lodnum = invlod.lodnum
   join invdtl
     on invdtl.subnum = invsub.subnum
   left
   join inv_ser_num
     on inv_ser_num.ser_lvl = 'D'
    and inv_ser_num.invtid = invdtl.dtlnum
   left
   join alt_prtmst
     on alt_prtmst.prtnum = invdtl.prtnum
    and alt_prtmst.prt_client_id = invdtl.prt_client_id
    and alt_prtmst.alt_prt_typ = 'GTIN'
  where @+invlod.lodnum
    and @+invsub.subnum
    and @+invdtl.dtlnum]
Summary
Before GS1 barcodes can be used seamlessly across an organization, the organization must first decide on what information the barcode(s) must contain. The amount of information in the barcode can ultimately affect the appearance, size, and/or layout of the label as well as the module width of the barcode symbology. LabelZoom makes it easy to tweak these various parameters and preview the label before deploying it to the application testing/QA environment.
We hope the guide and code sample above gives you a good starting point. If you require additional support, remember that all paid plans of LabelZoom include free e-mail support. We’d be happy to work with you to craft a solution that works for your business.

